
By John Knox, Washington Association of Conservation Districts Plant Materials Center, pmcjknox@gmx.com
The Washington Association of Conservation Districts Plant Materials Center (PMC) grows over two million plants annually, and the majority of them find homes in forestry and conservation projects throughout the Pacific Northwest. Some plants remain at the end of the season and need to be disposed of. I like to find ways to narrow the ratio of plants harvested to plants sold, and a series of questions returns. How can I preserve what has been produced? Are there ways to preserve these plants, and the work that went into producing them? Can I do it in a way that doesn’t significantly alter the bareroot production schedule? Can I do it in a way that people will want?
An answer is to pot them up, but there were a number of reasons why that option did not fit at the PMC. One of the only suitable places to site it is in the historic channel of the Samish River, and it is now a critical area prone to flooding. An infrastructure expansion would be needed to support it. I thought about the materials, primarily potting soil and pots, that would be required, and the thoughts of having to repeatedly purchase products made from non-renewable resources disqualified potting them up, too.
I like working with “the excited surface of the earth’s skin,” as I heard WSU professor Doug Collins describe the soil. I wanted a solution that would keep me close. I kept digging around, and I found a promising article from the University of Missouri’s Center for Agroforestry about how bareroot plants heeled into irrigated gravel beds survived fall planting.1 The option checked all the yes boxes, and it rose to the top.
The Missouri Gravel Bed is a way to heel in plants that promotes fibrous root growth. Plants are installed in the gravel bed during early spring, and roots grow through the large pore spaces between the pebbles. It is best to leave plants in the bed for six months. In October, the temperatures are cooling, and the plants are using less energy and preparing for dormancy. The fall rains are starting, and there is sufficient soil moisture to transplant. After they are transplanted, they slowly establish before dormancy. Then, they go dormant, and the winter precipitation saturates the soil which primes the plants with an abundant water source the following spring.
One of the most important things about the gravel bed is that it is watered regularly. A good watering target, at peak season, is 100 minutes per day. Start with less water in the spring and increase the amount in the summer, and back to spring levels in September. Try to withhold water in late September and October to help induce dormancy. Water at dawn, dusk, and a few times throughout the day. For example, if you are watering six times a day at peak season, then the watering interval is 17 minutes every four hours.
This is where it is nice to have an irrigation timer. It is very hard to over water the plants, because the water will leach out of the bottom onto, or into, the surface below it. I use drip irrigation with a filter and pressure regulator, but soaker hoses or an oscillating sprinkler should work fine. The irrigation is primarily what keeps the roots moist, and the humidity within the bed helps too.
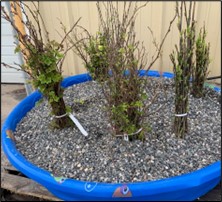

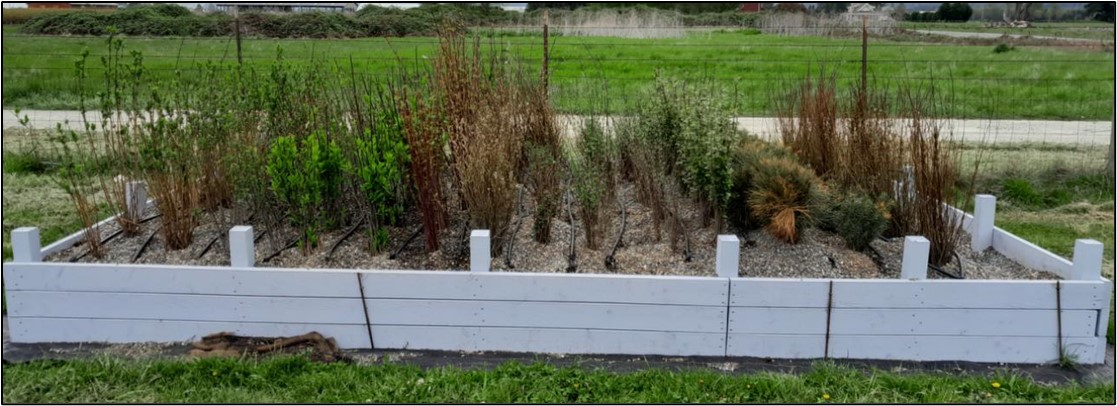
(These two images show the developmental progress through the season. They are the same plants. The left photo is taken in May, and the right photo is taken in July. Photos: John Knox)
Another important thing about the gravel bed is the depth of the gravel. A good target is 18 inches deep. The roots receive water from above and within the bed. The more gravel volume that is in the bed helps to keep more humidity around the roots. When the irrigation is off, the water within the bed warms up and any vapor diffuses through the pore spaces where the forming roots are. Also, it helps to install the plants a little bit deeper than when they are transplanted into the ground. The top inch or two dries out the fastest, and it is okay to have gravel above the root collar because there is plenty of oxygen moving through it.
Even though I found good information on siting, designing, and constructing the gravel beds, determining which plants to stock it with has been trial based. Gary Johnson’s work at the University of Minnesota on these gravel beds is instructive, insightful, and funny.2 His guide includes an excellent species suitability list for the gravel beds too. While most of the plants are typical for urban forestry in the Great Lakes states, it does provide some clues as to which ones work for PNW native species. Deciduous shrubs and hardwoods perform best, and more work needs to be completed on conifers.
Species that work well are: Cottonwood, Douglas Spirea, Golden Currant, Mock Orange, Oregon Ash, Osoberry, Pacific Crabapple, Peafruit Rose, Redosier Dogwood, Salmonberry, Serviceberry, Snowberry, Thimbleberry, Twinberry, and Woods’ Rose. Ponderosa Pine works but not as well as the others. I am trialing Bigleaf Maple and Oregon White Oak this season.

Notice new, white roots.
Photo: John Knox)
There is plenty to like about these gravel beds because they are low risk. I like that you can store a bunch of plants in a small area and the irrigation can be automated. I like that it can be reused and there is no cold storage needed. I like that there are few weeds. I like the affordability of these plants, and they are lightweight and easy to move. I like that it can be scaled to the size of the need, and I like that there are a variety of materials that can be used to make a gravel bed. Let your creativity work. I like to hope that this could be part of locally led efforts in restorative environmental justice, horticultural education, and adding native biodiversity to urban forests. However, I don’t like how the pea gravel falls back into the trench that was made. It would be a good idea to employ a guard to prevent the rocks from sliding back. I use three shovels. One to dig and two are guards in front and to the side.
Tips
If you think that this sounds like a good idea and that it is something that you would like to try, then below are some tips on how to get started. There is a materials list for the upgraded bed that was installed at the PMC. The first version used four kiddie pools with holes drilled through the bottom for drainage. The pools rested on big pallets, filled with pea gravel, and irrigated by soaker hoses.
- Always keep the roots moist.
- Set up the bed in a partly shaded area and protected from the wind.
- Set up the bed above ground level.
- Employ gravel guards when installing the plants because the gravel slumps from where it came.
- Use digging forks to lift the plants because shovels can sever many of the roots.
- Gently spread open the canopy because interior plants can get choked out.
- If you notice that the top leaves are wilting, then they need water.
- Don’t worry if you don’t get all the plants out in the fall; they can overwinter in bed until spring.
- A simple design is usually productive, cheaper, and better.
Materials list for the box with estimated cost for new supplies
| Item | Quantity | Estimated price |
| 2 “ x 6” x 12’ boards | 15 | $180 |
| 4” x 4” x 12’ posts | 3 | $90 |
| Landscape fabric | 375 ft2 | $50 |
| Landscape fabric staples | 1 box | $10 |
| Screws, 3” exterior | 1 box | $30 |
| Washed pea gravel | 12 yards | $400 |
Directions after cutting boards to size
1 – Lay out landscape fabric footprint and staple to the ground.
2 – Dig holes and install corner posts.
3 – Assemble end boards then sideboards. I recommend overlapping the boards to strengthen the joints. To build one of the long sides for example, stack a 6’ board on top of a 12’ board on one end and on the other end stack a 12’ board on top of the 6’ board.
4 – Install posts outside the box, and fasten the sideboards to the posts.
5 – Fill with pea gravel to a depth of 18”.
6 – Install plants, and they can be buried a little deeper past the root collar.
7 – Install irrigation last because it is easy to damage it while installing the plants.
Additional Resources
1 Starbuck, Christopher. (2006). The Missouri gravel bed: A method facilitating season-long planting of bare root trees and shrubs. HortScience: a publication of the American Society for Horticultural Science. 41. 944-944.
2 Johnson, Gary. A Guide to the Construction and Management of Community Gravel Beds.
